How To Install Rocket Chat Server Using Script on Ubuntu 18.04
In this tutorial how to install Rocket Chat server using script on Ubuntu 18.04 server. This is very easy step for installation process.
★ Download Rocket Chat Backup Script
★ Download Restore Rocket Chat Database Script
My server info:
#############################################
IP Address 	: 10.66.100.25	//Rocket Chat server
OS 		: Ubuntu 18.04
RAM 		: 2GB
vCPU 		: 2
Disk 		: 50 GB
Service 	: Rocket Chat
Version		: 3.15.0
#############################################
Step #01: Check my server ip and version using below command.
lsb_release -a && ip r
Output as like below.
No LSB modules are available.
Distributor ID: Ubuntu
Description:    Ubuntu 18.04.5 LTS
Release:        18.04
Codename:       bionic
default via 10.66.100.10 dev enp0s3 proto static
10.66.0.0/16 dev enp0s3 proto kernel scope link src 10.66.100.25
Download script from my script portal.
wget https://script.technologyrss.com/linux/rocket.chat/install-rocket-chat.sh
Setup executable permission.
chmod 755 install-rocket-chat.sh
Then run script file using below command.
./install-rocket-chat.sh
or
You can run without execute permission.
bash install-rocket-chat.sh
Then wait up to 10 – 20 min for complete installation process!
Reboot vps then run below command.
reboot
Then run below command.
mongo --eval 'printjson(rs.initiate())'
sudo systemctl stop rocketchat
sudo systemctl start rocketchat
sudo systemctl status rocketchat
When see status as like same then access web url.
Jun 17 13:53:46 chat rocketchat[876]: ➔ | MongoDB Version: 4.0.25
Jun 17 13:53:46 chat rocketchat[876]: ➔ | MongoDB Engine: mmapv1
Jun 17 13:53:46 chat rocketchat[876]: ➔ | Platform: linux
Jun 17 13:53:46 chat rocketchat[876]: ➔ | Process Port: 3000
Jun 17 13:53:46 chat rocketchat[876]: ➔ | Site URL: http://localhost:3000/
Jun 17 13:53:46 chat rocketchat[876]: ➔ | ReplicaSet OpLog: Enabled
Jun 17 13:53:46 chat rocketchat[876]: ➔ | Commit Hash: 55457025d6
Jun 17 13:53:46 chat rocketchat[876]: ➔ | Commit Branch: HEAD
Jun 17 13:53:46 chat rocketchat[876]: ➔ | |
Jun 17 13:53:46 chat rocketchat[876]: ➔ +-----------------------------------------------+
Access your server ip address and create admin account
Access details:
Access URL : http://10.66.100.25:3000/
Step #02: Access URL then create admin account.
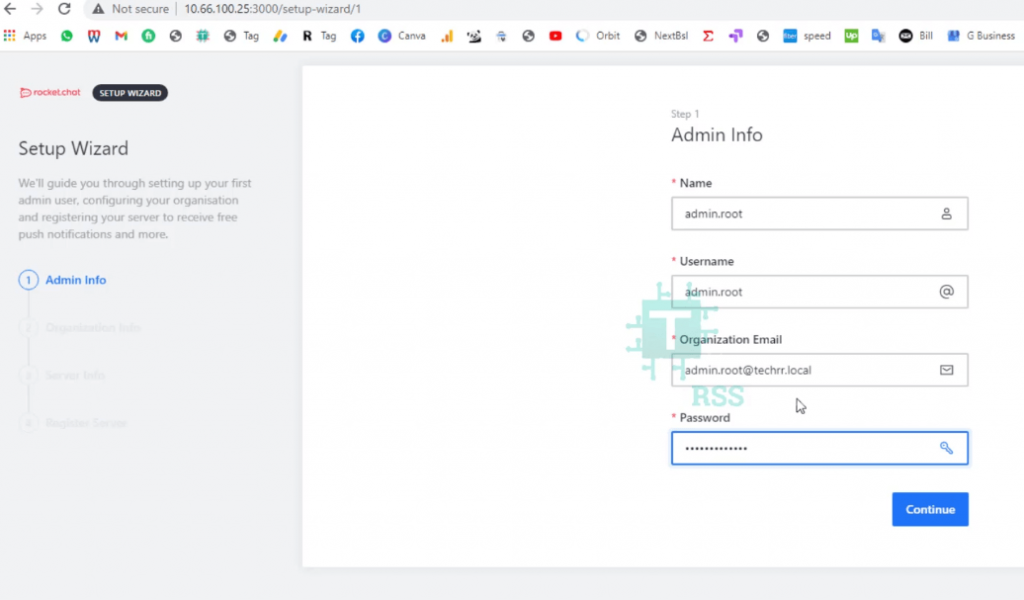
Name :
Username :
Organization Email :
Password :
Then click Continue and type your origination info.
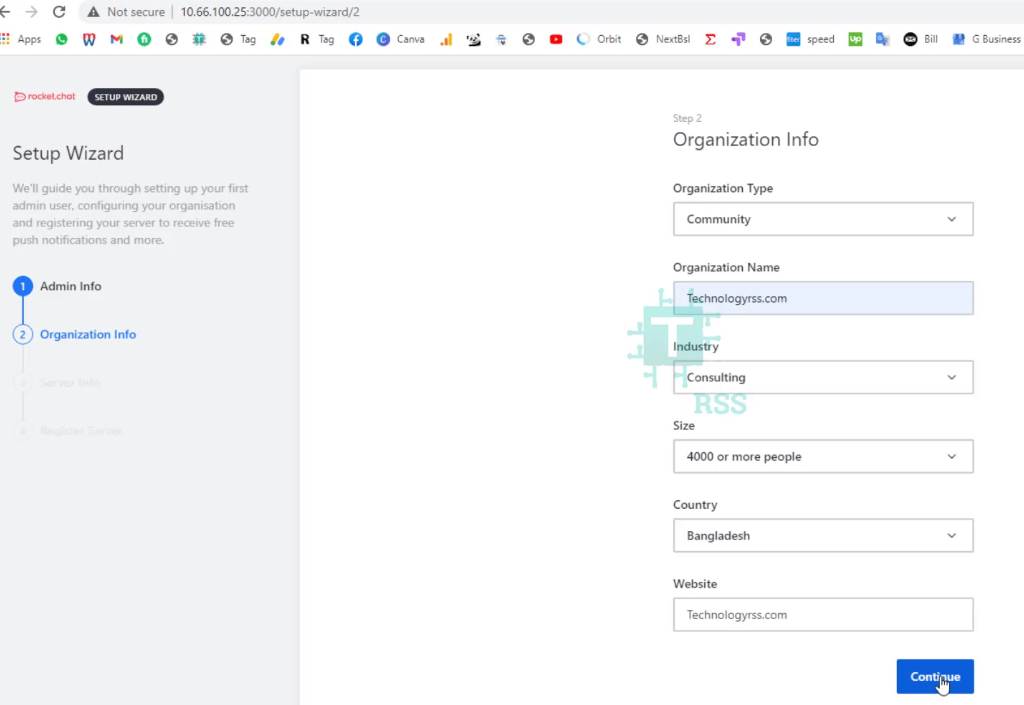
Organization Type :
Organization Name :
Industry :
Size :
Country :
Website :
Then click Continue and type your server info.
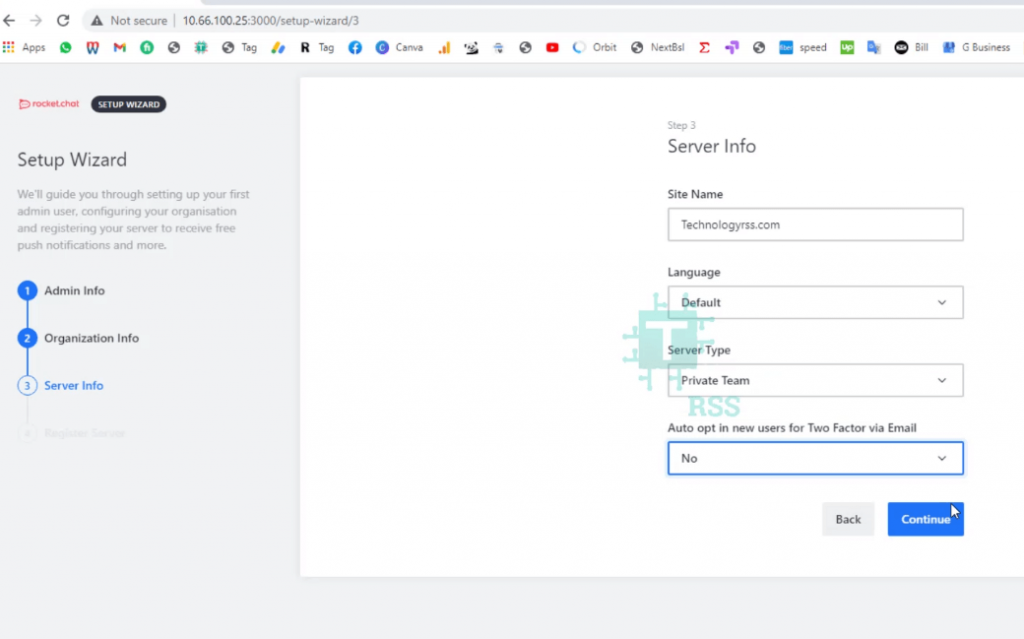
Site Name :
Language :
Server Type :
Auto opt in new users for Two Factor via Email :
Then click Continue and select standalone server.
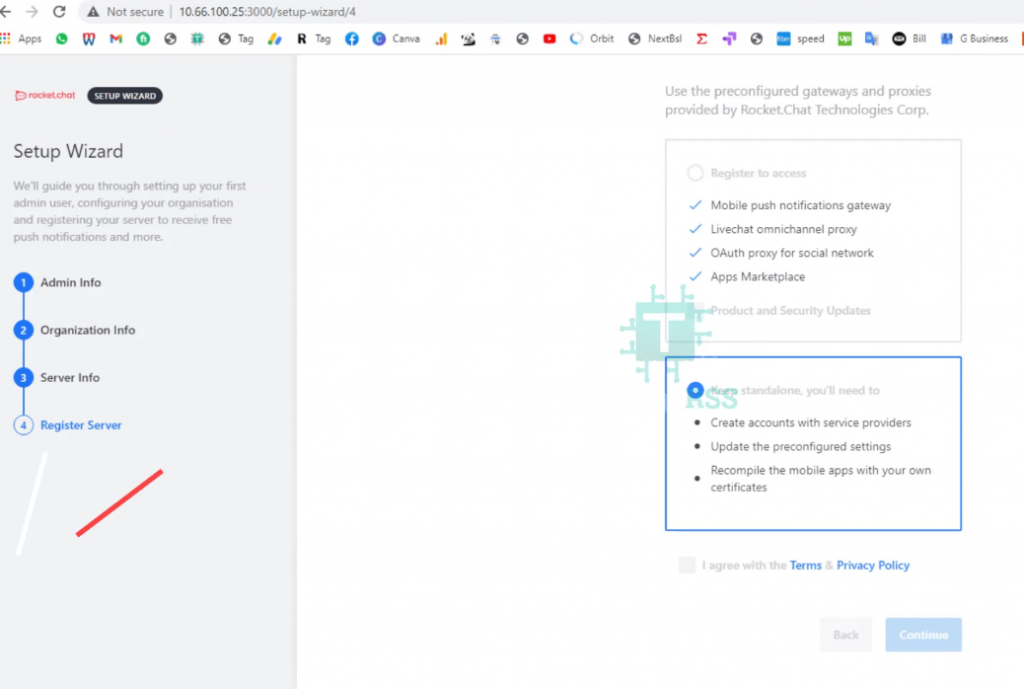
Now see, Your workspace is ready to use 🙂
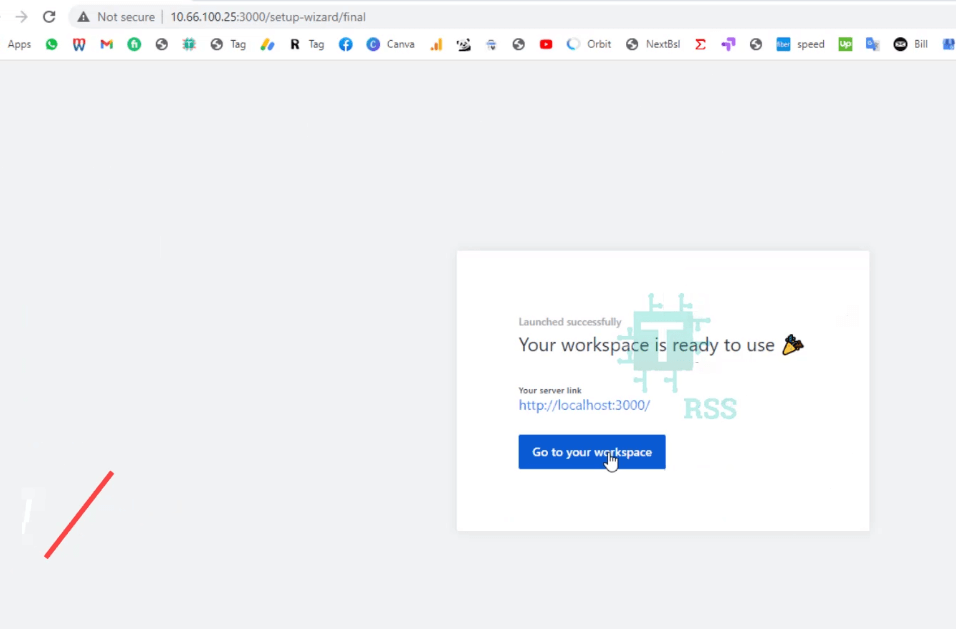
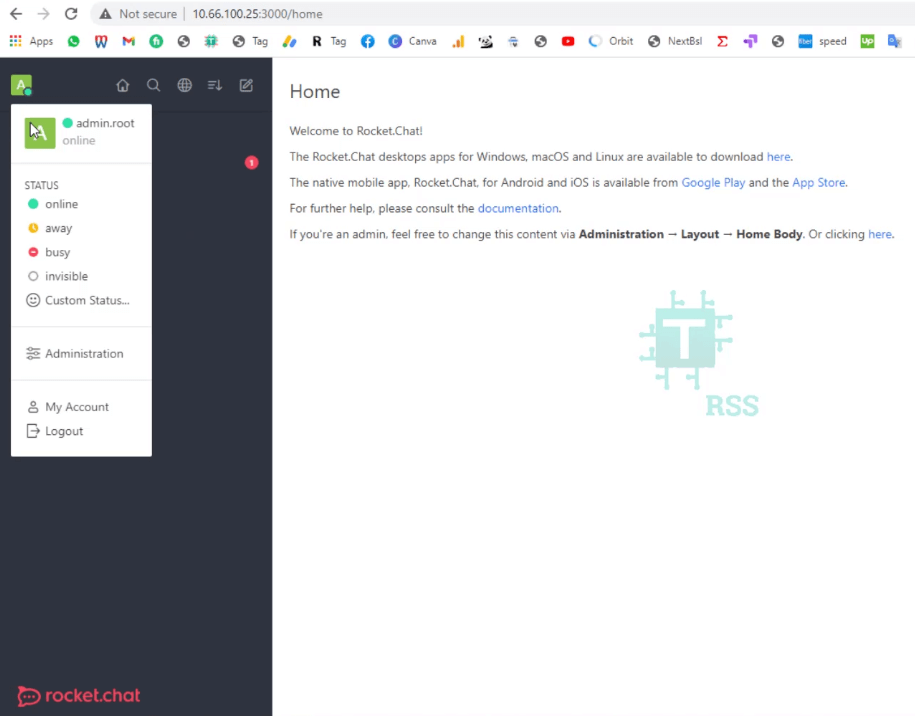
Click Go to your workspace and then see Administration info as like below.
If see any error so please see my YouTube video. Don’t forget subscribe my channel.
hello, i have followed your YouTube work and im up and running. but my rocket chat set is not safe, how can i enable ssh. my domain name have ssh and that what i want to use
Use this for setup SSL.
sudo apt -y install nginx
sudo apt -y install certbot python3-certbot-nginx
sudo certbot –nginx
sudo nginx -t
sudo systemctl restart nginx
Incredible! I was trying to install for a long time following the documents of the rocket but it never worked, it saved me!
Thank you so much! Please connect with us and share this guide to your social network.
Hi! How are you ? I’m studying your script and I found a small problem, after installing the RC everything works fine but I get the error “MongoDB version 4.0.27 is deprecated, please upgrade your installation.” I can update your script with a newer version of MONGO or how do I to update with the installation already done?